Quilting Supplies at Craftsy.com
04-01-2014

Union Jack Sewing Machine Cover Tutorial and Giveaway!

unionjacktutorial

Hi there! Paula here at The Sassy Quilter and I am so excited to be the first stop on the

Riley Blake Designs Union Jack Blog Tour!

Union Jack Blog Tour

So….Have you guys seen Riley Blake Designs super cute Union Jack panels!!! Well, I have come up with a sewing machine cover tutorial for you to put these snazzy prints to use. We don’t want our precious machines getting all dusty and if you have ever tried to piece one of these Union Jack designs you will totally appreciate how quick and easy these panels are to use.

Riley Blake has three different color options for a multi flag panel. The smaller flags within the panel are each 9″ x 11″. There is also a giant flag panel that measures 36″ x 42″ and comes in three color options. Click HERE to see!

Today I am using the Union Jack Squares Gray panel.

unionjackpanel

What you will need:

1 Union Jack Squares Gray panel.

5 Fat Quarters in assorted prints.

1/4 yard Border fabric.

1 and 1/4 yards Backing fabric.

1/2 yard Binding fabric.

rileyblakedots

I am using a collection of Riley Blake Swiss Dots with my panel prints!

Cutting:

From Panel-

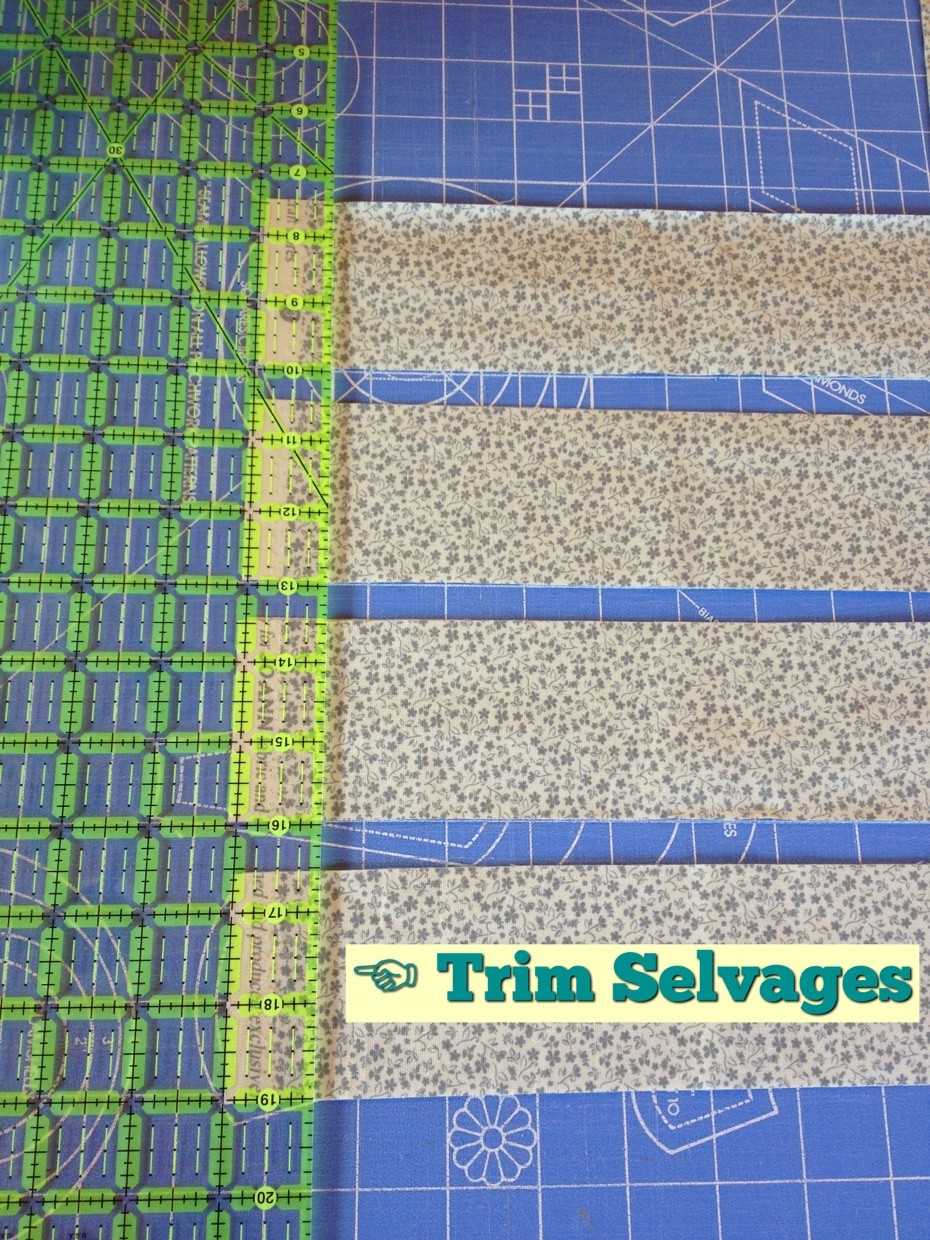
Trim two flags to 9.5″ x 11.5″- (1/4″ around the flag)

From Border fabric-

Cut (2)- 4.25″ x  WOF strips, then subcut (4) 4.25″ x 9.5″ rectangles.

Cut (2)- 2.5″ x WOF strips, the subcut (4) 2.5″ x 19″ strips.

From FQ’s-

Cut (1)- 9.5″ strip from each FQ, then subcut (6) 2″ x 9.5″ strips for a total of 30.

From Backing fabric-

Cut (1)- 17″ x WOF strip, cut again on fold to yield backing for front & back panels.

Cut (2)- 12″ x WOF strips, trim selvages and join along the 12″ edge. Trim this long strip to 12″ x 50″ and use as backing for the side panel.

From Binding fabric-

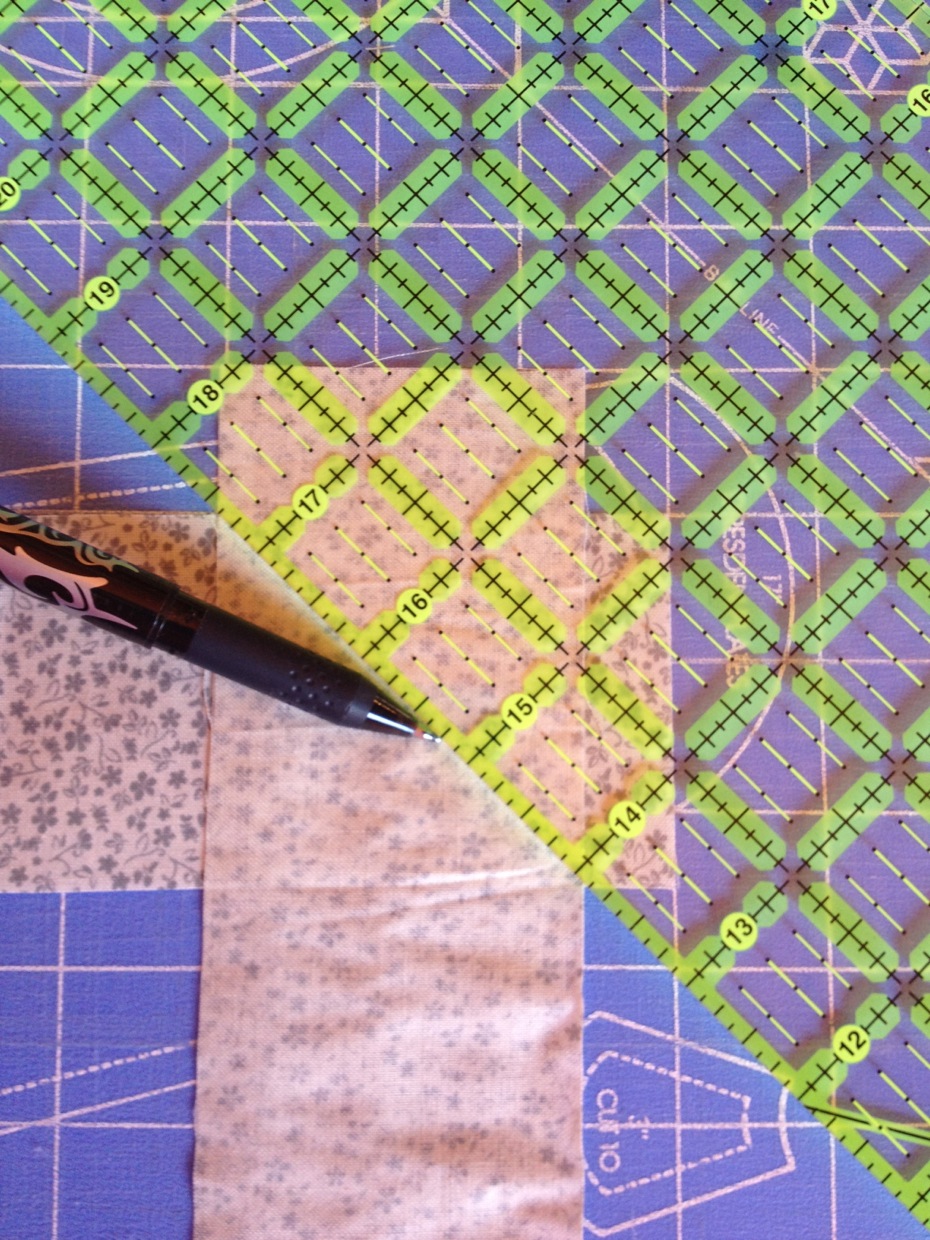
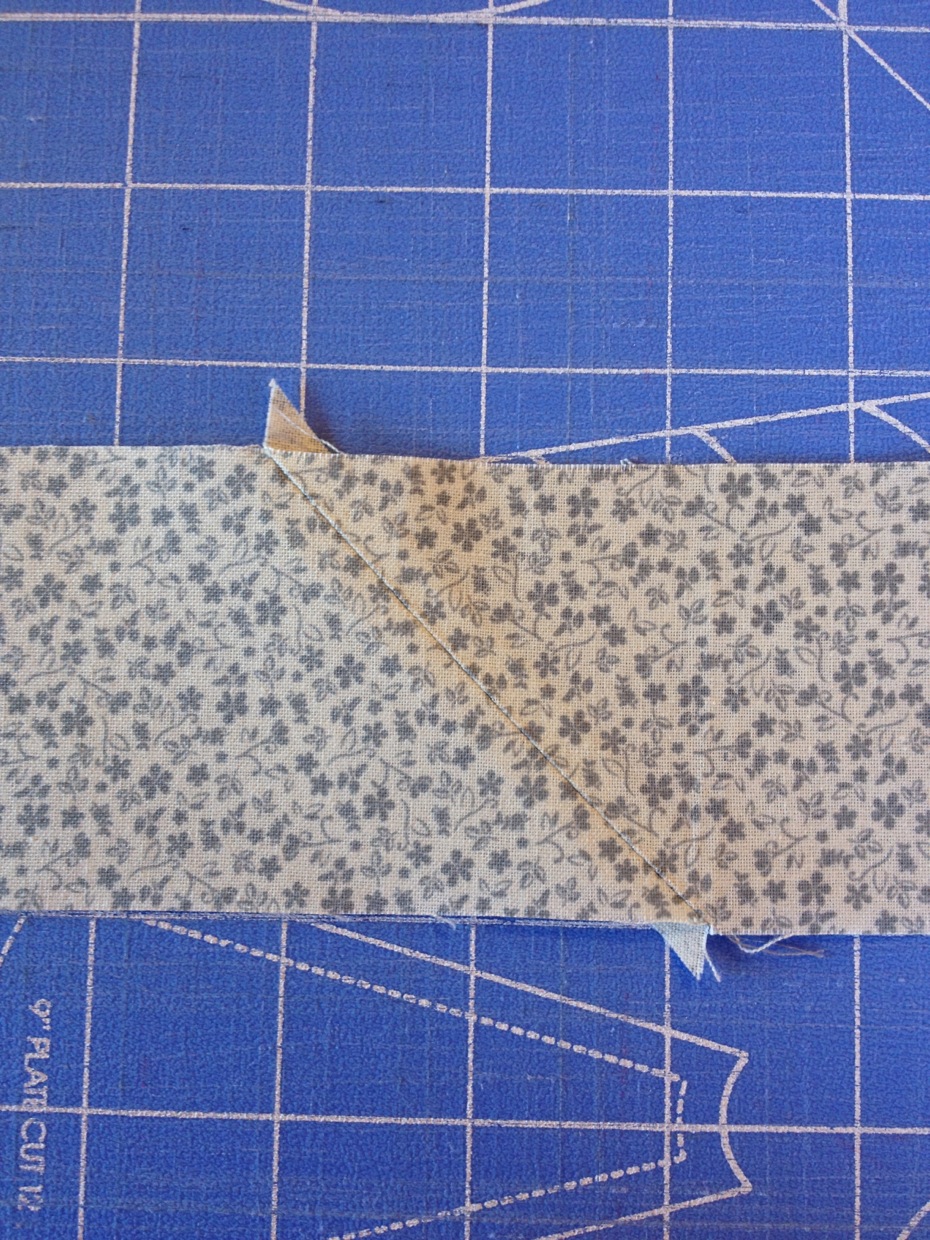
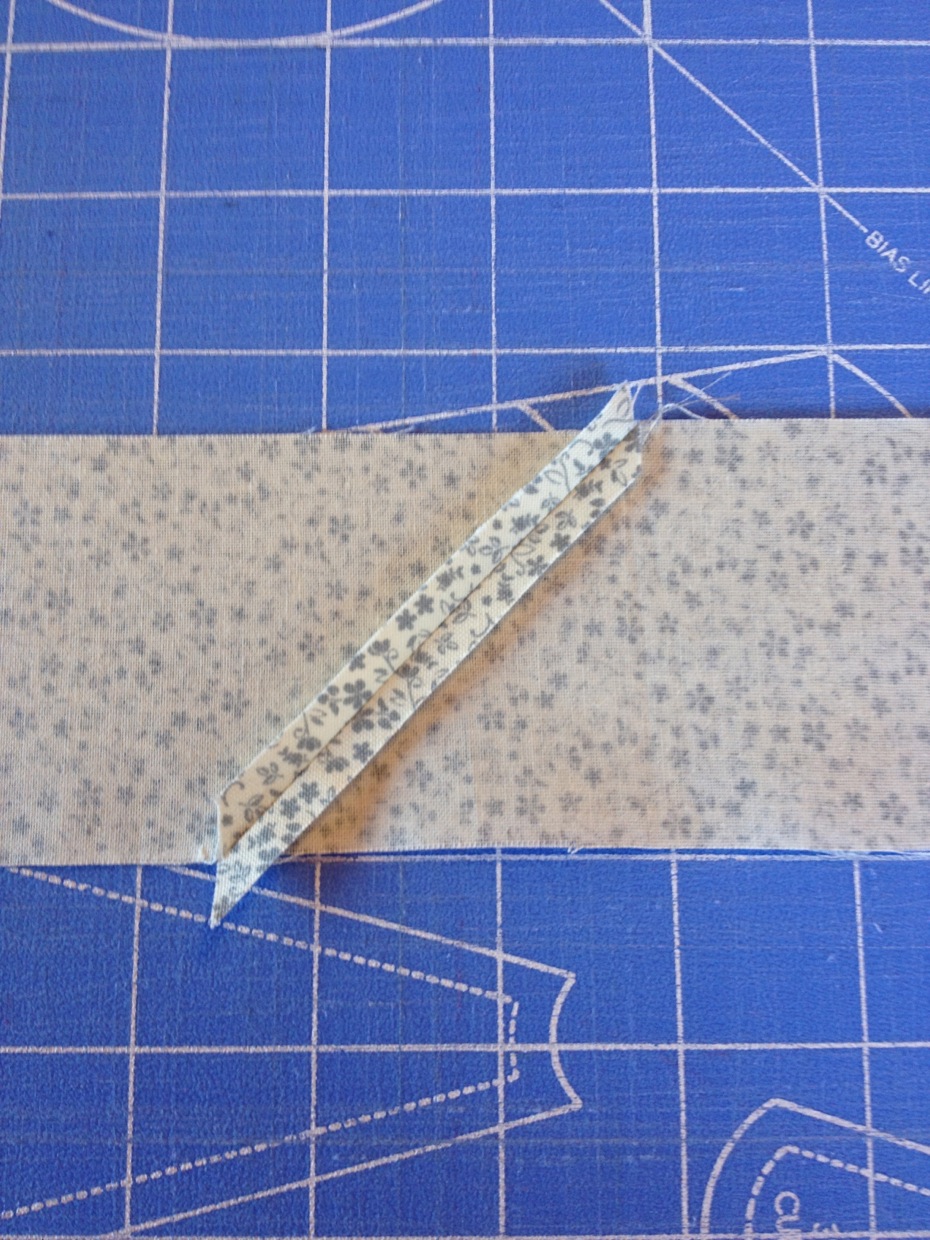
Cut (1) 18″ x WOF strip, then subcut 2.5″ strips on the bias and create at least 160″ of bias binding.

Construction

unionjackpiecingPiece together your front and back panels. Add your side borders first and then the top and bottom borders. Repeat for the back panel.

unionjack6

Join your 2″ strips together to form one long side panel.

      unionjacksidepanel unionjackquiltedfronts

Layer your front and back panels and your side panel with batting and backing, quilt as desired.

Trim your side panel to 9.5″ x 45.5″ and the front/back panels to 13″ x 18.5″.

Using your bias binding…bind the bottom edge of the front & back panel and both short ends of the side panel.

unionjackcenters

Line up the center point of the front panel with the center point of the side panel. Pin these together with the backing sides together.

unionjack7

Join these two panels together stopping and starting 1/4″ from the corners. Repeat for the back panel.

unionjack8

Now, pin the remaining sides of the front & back panels to the side panel and stitch together, also stopping and starting 1/4″ from the corners.

unionjack9

Your sewing machine cover should look like this, with raw edges exposed.

unionjack10

Now to bind these raw edges!

Starting at one of the bottom corners…Fold the end of your binding under about 1/2″ and start attaching your bias binding to the side panel side of the raw edge.  I stop and start 1/4″ from the top corners to avoid any puckering in the corner. Do not trim anything…just skip a few stitches and then keep going.  Bias binding is stretchy so should go around smoothly.  Stop sewing about 3″ from the final corner. Mark your binding strip and trim 1/2″ longer than needed. Fold this extra under and then finish attaching the binding. Repeat for the opposite side of the cover.

unionjack11

Hand stitch the binding to the front & back panels.

unionjack12

The finished dimensions are 9.5″W x 13″H x 18.5″L. It will fit most average size machines.

  unionjack13

Done! I think it looks bloody fabulous;)

Wanna see the inside???

insidecover

Do you want to make one of these? Fort Worth Fabric Studios is offering you a special deal this week and a GIVEAWAY!

Fort Worth Fabric Studio

20% off all Union Jack Panels through April 7th with discount code:

UNIONJACK20

Click HERE to get your panel, or….

Click HERE to get this awesome kit Jodie created! She even has one for me to GIVEAWAY!!!

***GIVEAWAY!***

Leave a comment to enter to win this kit to make your own sewing machine cover:)

(Giveaway ends Sunday at midnight/EST, open internationally.)


Riley Blake Union Jack Blog Tour Schedule:


Tuesday 4/1 – Paula at The Sassy Quilter- You are here:)

Thursday 4/3 – Jina at Jina Barney Designz

Tuesday 4/8 – Karin at Leigh Laurel Studios

Thursday 4/10 – Marni at Haberdashery Fun

Tuesday 4/15 – Julia at My Fabric Obession

Thursday 4/17 – Molly at Rose and Odin

Tuesday 4/22 – Amanda at Jedi Craft Girl

Thursday 4/24 – Madame Samm at Sew We Quilt

Tuesday 4/29 – Julia at Riley Blake Designs

Thursday 5/1 – Ginny at Darling Adventures
 

 Hope you enjoy your visit here today! Here are a few things you might want to check out:

Helpful Charts– a collection of charts useful to Quilters, Quilting Tips– tips and tricks for Quilters, Free Tutorials and Patterns for beginners and Quilty Fun– quilting games perfect for retreats and guild meetings!

I am also currently hosting a Triangle Quilt Along and it is never too late to join in!

Trianglebutton250

You can find and follow TheSassyQuilter  on Facebook, Pinterest, Bloglovin’, Instagram, Twitter or by email updates(form on right sidebar)!

Keep it Sassy


Share Button
03-22-2014

How to link up my picture..

TriangleButton800

If you already have mastered Flickr and linking-up….you probably want to skip this post:)

but…

If this is your first time using Flickr or linking up a picture, take a deep breath and I will show you some basic steps and you will have it down in no time:)

Here is a how to:

The link up area will be at the end of the post. Click on the blue button that says “Add your link”

Addyourlinkbutton

Click this to add your link!

The next screen will be….

Inlinkz screenshot

This is what your screen will look like after you click “Add your link”

•A box will pop up and the first line will be asking for your: Link or “the URL of the link you are adding”. This is the web address at the top of your screen that shows where exactly you are in the world wide web:) Starts with http:// or www. You can copy this from where you have your image at and just paste it in this first line.

•Click in the next line titled: Link Title or “The name that will be visible under your thumbnail”. The program should automatically search for the image and fill in this line for you. If you have entered an incorrect link it will give you an error and you can go back and fix it now. If using Flickr…you have to have your pictures set to a Public setting for Inlinkz to access them. I keep my entire Flickr account set to Public, no secret info there, just quilt pics:)

•You can leave the link title or name as it is or change it to whatever you like. I usually change mine to Paula@TheSassyQuilter so people can easily see whose picture it is. It will help us get to know each other a bit too!

•The next line will be asking for your Email address. Type that in.

•Below this will be an area titled Image Source. Here will be a grid of all the pictures they found on the webpage you entered. Click on the one you want to use or use the option tabs to add another. I never have to use the other tabs. If you don’t see the one you want make sure you have scrolled down through the options.

Now Click done!  The next screen will give you the option to share on other social media sites. You can do that or just click “Take me back to the Link Up”.

Done!

How to use Flickr!

Flickr is a great way to share your work and interact with other quilters!

You will have to join Flickr and create a yahoo id and a username/password….same as all the other social media. Below is a pic of my personal photostream or homepage on Flickr. You can personalize it by adding a profile pic and cover photo. Make sure you are set to Public for sharing your photos or we won’t be able to see them:)

IMG_5898

Joining the group…

Once you are set up you need to join the Triangle Quilt Along Flickr Group, click this link to get there.

IMG_5900

It should take you to the page above. In the blue circle is out logo button. Where the red button says “leave group” will say “join group” if you haven’t joined yet.You can add photos to the group by clicking the add photos button inside to logo, this is if they are in your photos already. Keep reading to see how to get them in there.

Discussions

IMG_5901

Above that is a discussion area, check here for ongoing discussions with your fellow quilt along members:) The first is one for introductions so we get to know each other.

Uploading your photos…

IMG_5899

When on your personal page, click the Upload button to add your photos. It will then prompt you to get them off your computer.

  IMG_5897

Once you pick your photo there is an area below it to title and add a description if you chose.

IMG_5895

You can add directly to the group at this time also! Just click “Add to groups” and pick which group you want to add too.

IMG_5896

Once you are all set…click “Upload” in the corner and you are set!

Flickr Mobile!

If you have a smart phone you can get the free app and upload pics from your phone. It will be the app by yahoo.

IMG_5905

Once you open the app, click on the camera and choose from the pics on your phone or ipad.

IMG_5906

Click on the “Advanced” option and you will be able to add to the group at the same time!

IMG_5907

Click group and find the Triangle Quilt Along Group. It will only be there if you have joined the group already.

Then just hit the Upload button in the upper right corner and you are done!

Hope this helps you guys! Please email me or comment if you have any questions:)

I would love you to Grab a Button! and Share:)

Trianglebutton250

You can find and follow TheSassyQuilter  on Facebook, Pinterest, Bloglovin’, Instagram, Twitter or by email updates(form on right sidebar)!

Keep it Sassy


Share Button
02-09-2014

How to Clean a Sewing Machine and a Giveaway!

IMG_5126

Are you having tension issues or skipped stitches?

Well, you might just need to do a little sewing machine maintenance! This means cleaning your sewing machine and giving it a little TLC:) This post will give you some tips and show you how to clean a sewing machine. Now I am as guilty as the rest when it comes to cleaning my machine, but it is seriously one of the most important things you can do as a quilter….these babies are our lifeline, right?

Why do I have to clean my machine?

Our thread and fabrics produce a lot of lint and dust that gets down in the feed dogs, bobbin case and under the throat plate while we are sewing. You will be really shocked if you have never looked inside these parts of your machine! This dust and lint can cause the parts of your machine to not work properly and the result is tension issues, skipped stitches and even machine failure. My machine has a lot of electronic sensors and if I don’t clean it, I notice they start to not work properly.

What do I need to clean my machine?

IMG_5124

A screwdriver, a lint brush and my favorite….a pipe cleaner.

How do I get inside the machine?

First and foremost, consult your machine manual! Some machines are different, but here is the basics. Remove your bobbin cover and bobbin and then using a small screwdriver, remove your throat plate. My favorite screwdriver didn’t come with my machine, but it has a magnetic tip on one end that helps me catch those tiny screws so I don’t lose them.

IMG_5044

What do I do now?

Using your lint brush and your pipe cleaner, gently remove all the lint you can see. I use a pipe cleaner that has these fluffier parts, they really grab a lot. Swipe all the areas that your thread travels; the tension discs and the take-up lever can also get linty.

IMG_5040

IMG_5041

I use a piece of scrap batting to wipe it on so it doesn’t try to run away:)

IMG_5032

Yes, I took some of these pics after the fact….are you ready to see what I pulled out first????

IMG_5048

Um, what the heck is this thing! Disgusting. I told you I was bad.

You will also need to lift out your bobbin case. Take note of how you got this out so you can put it back. Take a pic with your cell phone if you want to keep a reference. Most of these parts only go back in one way.

IMG_5047

Get ready for more nasty!

IMG_5046

Some references will tell you to use compressed air to blow out the dust, but others believe this forces dust into other areas where is shouldn’t go….use your discretion, but I skip the forced air(and I think most of us don’t have any!)

Put everything back in place and do some test stitching to make sure you are back in working order! Craftsy has a free video on how to clean your machine called Sewing Machine 911. It has lots of other good machine maintenance tips too. Click on the link below to check it out! This is great for beginners.

FREE Online Sewing Class

What else can you do to take care of your sewing machine?

•Keep a cover on it. This keeps all the dust and maybe even pet hair that floats around from settling in your machine.

•Change your needles often! Why do we spend hundreds of dollars on our quilts and shrink away from changing a one or two dollar needle? Your machine likes it and your quilting/piecing will be more accurate. About every 8 hours or even every project is good.

A GIVEAWAY!

This past week I won an awesome selection of Superior Needles from Superior Threads!

IMG_5122

So as an incentive to get you to change your needles and because it is almost Valentines Day…I am going to share the love!

IMG_5125

I am going to giveaway this variety set of Titanium coated needles! Just leave a comment below and you are entered.

Contest ends Friday at midnight, Feb. 14th. Open internationally:)

You can find and follow TheSassyQuilter here on Facebook, Pinterest, Bloglovin’, or by email(form on right sidebar)!

Keep it Sassy


Share Button
01-30-2014

My First Guest Post!

Honeysweet Table Topper

Visit me today over at Bear Creek Quilting Company’s Blog!

They invited me over for a visit to share a tutorial for a Valentines Table Topper using their Honeysweet Jelly Roll by Fig Tree & Co for MODA, which you can get at their quilt shop HERE.

Sign up for their newsletter HERE for a chance to win a $25 gift certificate to their shop!

Check it out!

You can find and follow TheSassyQuilter here on Facebook, Pinterest, Bloglovin’, or by email(form on right sidebar)!

Keep it Sassy

Share Button
10-06-2013

~Pumpkin Table Topper~

IMG_3518

Hola pumpkin peoples!

I hope everyone had a wonderful weekend. I managed to get my pumpkin table toppers finished and tried to do two different looks here, one a little more traditional and one modern.

IMG_3441

IMG_3444

I had a little fun and used a little FMQ to create the stems!

IMG_3464

 These are pretty quick and easy and are constructed using your basic snowball block design. I thought I would share my pattern with you guys in case you wanted to whip one up for the fall festivities.

Here is what you will need:

~Supplies~

Background fabric– 1 Fat Quarter. Cut (16) 1.5″ squares and (5) 6″ squares

Binding fabric– 1 Fat Quarter or a 1/4 yd cut of chosen fabric. Cut (4) 22″ x 2.5″ strips from FQ or (2) WOF x 2.5″ strips.

Pumpkins– 4 Fat Quarters in assorted oranges, you will not need very much so you can just use any orange scraps you have too. Cut (4) 6″ squares.

~What to Do~

Press your 1.5″ background squares in half to leave a crease diagonally across the square.

IMG_3418

Pin these to each corner of your pumpkin square. Make sure they are right sides together.

IMG_3419

Sew along the crease. No marking required! Just follow that creased line.

IMG_3421

Trim off the corners to leave your 1/4″ seam. If your feeling sassy you can do 2 corners at a time:)

IMG_3423 IMG_3422

Press open your corners on your pumpkin.

IMG_3427

To finish up the topper you will sew the pumpkins and background squares together in a basic 9-patch design. Press your seams toward the background squares.

IMG_3439

Layer up your quilt sandwich and have some fun with your thread to quilt on some crazy stems however you like. If you are not feeling comfortable with that, you can always applique on some or hand-stitch them…oooh that would be cute! Once you are done, just trim up your quilt sandwich and bind. If you need help making your binding strips or actually binding the topper just click on the links for some extra help.

IMG_3484

Oh, and by the way…don’t you just love these little pumpkins we made at my last guild meeting! Jennifer, one of my fellow Sassy Quilters, was generous enough to bring all the supplies and teach us how to whip these up in minute:) Thanks Jennifer!

IMG_3486

Keep it Sassy

Links:

stitch by stitch Better Off Thread  Fresh Poppy Design

Share Button
09-19-2013

Prism Reveal

photo-3

~Prism Revealed~

Tada! Prism is all finished up and photographed. I titled this one Poseidon’s Prism…okay I am not that original, I used a Poseidon FQ Bundle by Robert Kaufman and the pattern name is Prism:) I did this quilt as part of a quilt along over at 13 Spools. The pattern is by Faith@FreshLemonQuilts. It is paper pieced and was super fun and easy to do.

I went with the twin size, so it is 70 x 85. I haven’t made one this big in a while so I had to get my quilt arms back in shape. It’s amazing how much heavier the big ones are when you are pushing and pulling them through your machine. I quilted this one on my domestic machine. All straight lines so I used an even-feed foot(walking foot). I quilted it SITD(stitch-in-the-ditch) style. I think it would look fabulous with a lot of fancy quilting in these prisms, but I was a little crunched for time and to be honest I like that it feels nice and soft.

I had some fun playing around with the photos so here they are:

IMG_3135

IMG_3132

IMG_3118

IMG_3178

Since this quilt is for an entry in my State Fair I had to make a hanging sleeve so they can display it. Here is a little tutorial to show you how I did it:)

~How to make a Hanging Sleeve~

IMG_3145

Measure across the top of your quilt, minus two inches. Now cut a strip of fabric that width by 14″ long. This is for a sleeve that will finish 6″(required length for this Fair). You can adjust the length to accommodate your own needs. For example, a smaller wall hanging may only have a thin rod to hang on so a 3″ sleeve would be fine. Take your finished size and double it, then add 2″ and you got it.

IMG_3148

On the short ends of the strip (14″ends), Press approximately a 1/4″ fold toward the wrong side of fabric.

IMG_3150

Do it one more time to get a finished edge on the inside. This also makes sewing a straight line easier.

IMG_3151

Sew along the inner edge.

IMG_3155

With the wrong side up, fold the strip in half and press.

IMG_3157

See the crease running along the center here.

IMG_3160

With the crease as your guide, fold the lower and upper halves to meet in the middle along the crease. Now, press/steam these outer edges firmly to leave another set of creases.

IMG_3161

Fold the sleeve right sides together and sew your 1/4″ seam along the raw edges. With your sleeve still inside out at this point, finger press open the seam. Finger press here so that you do not disturb the creases we already made. They are our guides for mounting the sleeve to the quilt.

IMG_3165

Turn the sleeve right sides out and you should have a D-shaped sleeve. The two strong creases are the top and bottom edge of the sleeve. One side of the sleeve is shorter and will lie flat against the back of the quilt. The other side forms the rounded D-shape and is a little longer to allow room for the rod that the quilt will hang on. You need this extra space so the quilt is not distorted when it hangs.

IMG_3166

Now center and pin the top edge of the sleeve across the top of your quilt, about 1/2″ below the binding.

IMG_3174

Next, pin the bottom edge of the sleeve along the crease, keeping the bottom of the sleeve flat. There should be a tent/teepee area in the center. Do not stretch it out flat, remember we need this extra space.**After pinning, I like to do a test hang on a broom handle or rod to make sure everything hangs straight, so nothing has to be ripped later.**

IMG_3169

Last, but not least….whip stitch along the creases and the sides to attach the sleeve to the quilt.  The stitches should be about 1/4″ apart, making sure to take a bite into the batting, but not through to the other side of your quilt!  The above pic is a demo with white thread just so you can see it, using a matching thread is always best.

That’s it! Pretty simple actually. P.S. If you don’t plan on hanging the quilt permanently…don’t stitch as tightly and you can remove/save it and use it on another quilt later.

Here is my other fair entry…in case you haven’t heard me talk about it 100 times!

IMG_3092

Wish me luck

Links:


Share Button
05-17-2013

Binding your Quilt – Part 3

 IMG_1425

For the complete guide to binding your quilt…click here!

Are we done yet? Machine Finishing your Binding

1. Now that all your binding is attached to the front of your quilt, you now have to secure it to the other side.

Once again, start at a mid-point of one of the sides of your quilt. Fold the binding over to the backside of the quilt. Secure it to the back with a pin, making sure to cover the previously stitched line. You can go ahead and pin the binding along the entire quilt edge or just work in sections.

IMG_1149 IMG_1150

2. When you get to the corner, make sure you turn it completely, pushing the corner out to a nice point. Fold one side of the binding over and pin. Then turn the other over and pin. They should overlap forming a fold that goes out to the point of the corner(mitered fold).

IMG_1156 IMG_1157

3. Turn the quilt over so that you’re looking at the top of the quilt. Insert your needle into the seam where your binding meets the quilt top. The goal here is to sew in the seam line. When you pinned the binding over to the back of the quilt and made sure to cover the line of stitching, you made sure that you will catch the fabric when stitching on the front of the quilt. Sewing in the seam line hides your stitching on the front of your quilt,too.

If you use a matching thread it won’t be so noticeable if you wander out every now and then, like that could ever happen...

IMG_1155

4. When you get to the corner, leave your needle down directly in the corner. Lift your presser foot and turn the quilt so you can head down the next side. Keep going till you get to where you started, then sew a few stitches over your beginning stitches and you are done!!!

Fantabulous!!! Your SASSY binding is D-O-N-E!

(Look at that quilt, whipping in the breeze…so securely bound it could last for ages!)

IMG_1167


Great Job! All you Sassy Quilters out there:) Keep me posted on your binding and let’s get these quilts finished!

Happy Binding

Click here for the complete Sassy Guide to binding your quilt!

Share Button
05-03-2013

Binding your Quilt – Part 2

IMG_1424


How do I join the Ends!?!

1. First, determine the unfolded width of your binding strip. In my case it is 2 1/2″ .

2. Overlap the ends of your binding strips and trim the ends so that they overlap by the same amount as the width of your strip. Here they are overlapped 2 1/2″. Do your trimming so you are still working in the middle of your unfinished area. This just makes it easier to handle under the machine.

IMG_1376

3. Now, lay the ends of your binding strips face to face at a right angle, and pin securely. Draw a line from corner to corner (using the corners that connect to the binding, not the outer and inner corners). If you sew the wrong corners, don’t worry, it will not look right and you can just pick out and try again. If the quilt is toward you, this should look like a little mountain top.

IMG_1139

4. Sew along this line, remove your pins and open it up to make sure its right. If it looks good, go ahead and trim your excess off, leaving a 1/4″ seam. Finger press the seam open and re-fold your binding in half.

IMG_1141 IMG_1142

5. Pin the binding in place and start sewing a few stitches on top of where you left off and over top of where you started, to make sure there are no gaps. Yay! You made it all the way around:)

IMG_1143

 Check in next week for Part 3 – Are we done Yet? Finishing your Binding by Machine

Share Button
04-26-2013

Binding your Quilt – Part 1

IMG_1423


Before you start…..you have to create your binding strips!

Check here for how to make your own binding,

or buy some pre-made(you may still have to join some packages together to have it long enough).

Get your binding strips cut, joined together and then pressed in half

and you are ready to get this binding partay started!


Where do I start?

1. Trim and square up the edges of your quilt. You should have excess backing and batting that needs to be removed.

IMG_1379

2. Start the binding process at a mid-point on one of the sides of your quilt. It is hard(if not impossible) to join your ends together at a corner, and its less noticeable if it doesn’t look fantastic….like that could ever happen, your a quilty superstar and you can do this in a snap!


3. Leave a 6″ tail of binding before you start attaching it to your quilt. This gives you room work in when joining the final two ends together.

IMG_1122

4. Pin your binding to the front of your quilt. You want the raw edges to line up with the outer edge of your quilt, this means the folded edge is toward the center area of the quilt. Pin the binding just until you get to the first corner you come to. Place a pin or mark a small line 1/4″ away from the very end of your top. Don’t worry this mark will be on the inside so you won’t see it.

IMG_1124

5. Now start sewing  a 1/4″ seam along the binding, removing pins as you go. Take a couple of back stitches at your starting point. Continue sewing along the binding and stop 1/4″ away from the corner(at your pin or mark). Again, take a couple back stitches and then take your quilt out of the machine. We need to fold the binding a little before we continue.

IMG_1123

6. Fold the binding strip upward, this should make a triangular fold with the point going directly into the corner of your quilt(left pic); Now, fold the binding strip back down onto the next side of the quilt you will be working on. This fold should be flush with the side we have already attached(right pic). Pin this in place at the fold and continue to pin along this side of your quilt, marking/pinning the 1/4″ mark at the next corner.

IMG_1126 IMG_1127

7. Start sewing your 1/4″ seam again, beginning at the very edge of the quilt. Stop again at your next 1/4″ mark or pin before the corner, and repeat the corner folds from step #5.

IMG_1131

8. After you round your last corner, stop approximately 12″ apart from where you started. Take a couple of back stitches, and remove your quilt from the machine.

IMG_1133


What is the most frustrating part of binding your quilt???

Check in next week for Part 2 – How do I join those Ends!?!

Share Button
04-18-2013

How to make Binding like a Pro!

 IMG_1119


1. First things first……you need to decide how much binding you will need.

Here is a great binding calculator you can use:

lilystreetcalc


Just plug in your numbers for your quilt size(ex. 45″ x 60″), width of your fabric(42″ is a safe #), beginning width of your binding strips(usually 2  to 2.5) and it will tell you how much yardage you need and how many strips to cut….Awesome:)

Now that you know how much you need, go ahead and cut your strips.

2.The next step is to prep the strips so we can join them together. I like to leave my strips folded in half, just like when I cut them, and then trim the selvages off the ends.

                         IMG_1378        IMG_1080

3. Unfold and place one end of a binding strip right side up, lay the end of another strip wrong side up on top of the strip at a right angle(like the letter “t”). It should overlap on all sides. Use the lines of your mat to make sure it’s straight.

IMG_1380


4. Draw a line from corner to corner. I like to pull the fabric over my ruler to see if this makes a continuous strip, just to check myself….it never hurts. Secure with pins on both sides of the line so it doesn’t slip.

                          IMG_1099         IMG_1100  


5. Sew directly on the marked line. Line up your 1/4″ mark on your ruler along the stitched line and trim excess.

IMG_1105

6. Press open and then press open your seams on the back. Making bias binding(binding where seams are joined at 45 degree angle) and pressing open seams allows your binding to be less bulky where it joins the next strip. Continue adding strips until you have one long strip of binding.

                       IMG_1109           IMG_1110


7.Trim your “dog ears” off the edges.

IMG_1111


8. Now….to the ironing board. Fold the binding strip in half and press closed. Working your way down the entire strip.

IMG_1112


Your binding is ready! Isn’t it cute?

IMG_1114 IMG_1119

 Sassy Binding….if I don’t say so myself:)

***CHECK IN TOMORROW FOR A FREE ,FABRIC, FRIDAY GIVE-A-WAY!!!***

Share Button