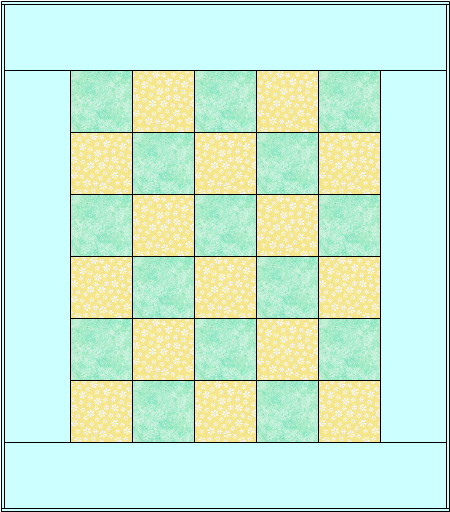
 Easy Beginner Project- Baby Charm Quilt
32″ x 36 1/2″
What you will need:
30- 5″ squares, use a charm pack or cut your own. A charm pack has several pre-coordinated fabrics and makes picking out your colors a little easier.
If cutting your own- you will need 1/2 yard of each of the two colors you pick for the center of quilt.
1 yard for border and binding.
1 1/4 yard for backing.
1 pre-packaged roll of low-loft batting, needs to be at least 38 x 43 inches. Can be cotton,polyester, or a blend.
What to do:
Press all your fabric first, starch if you like.
If cutting your own charm squares, cut fabric into 5″ strips and then cut again into 5″ squares.
Cut 4- 5″ strips of your border fabric, one for each side.
Cut the border strips again until you have 2- 27 1/2″ long strips, and 2- 32″ long strips.
Cut 4- 2 1/2″ wide strips out of the border fabric for the binding.
Layout your squares however you like; random, alternating, dark to light….no wrong way to do it.
Sew squares together in rows, then rows together to make center of top.
Now sew your borders to your quilt top starting with the side borders. Line up and pin borders to the quilt top at the start of your seam, end and then a few in the middle. I don’t always pin, but it really keeps the borders from looking wavy when your done.
Sew the top and bottom border pieces the same way.
Press, and your top is done! Yay!
Now sandwich your quilt with backing (wrong side up), batting layer, and quilt top(right side up).
Baste layers together using safety pins or spray adhesive, make sure to keep it smooth and flat.
Quilt as desired, then apply binding to finish off. MSQC has some great videos to help you do that.
(pattern is based on use of 1/4″ seams and 44″ wide fabric)
Here is my finished quilt top!
Keep it Sassy♥


Love your easy patterns. Hope to see more of them.
I am looking for the Double Slice Layer Cake Quilt Pattern. Do you know where I can find
it?
Love this idea!