Quilting Supplies at Craftsy.com
12-10-2018

Sassy Tip-106

 photo sass_zps1d67b1d3.gif

Sassy tip #106:

Trimming Half Square Triangles!

I recently was at a quilt retreat and shared these tips that I use to make speedy work of trimming half square triangles…

This ruler right here is a life saver!

Related image

•With this ruler you are trimming two sides of the triangle at one time!

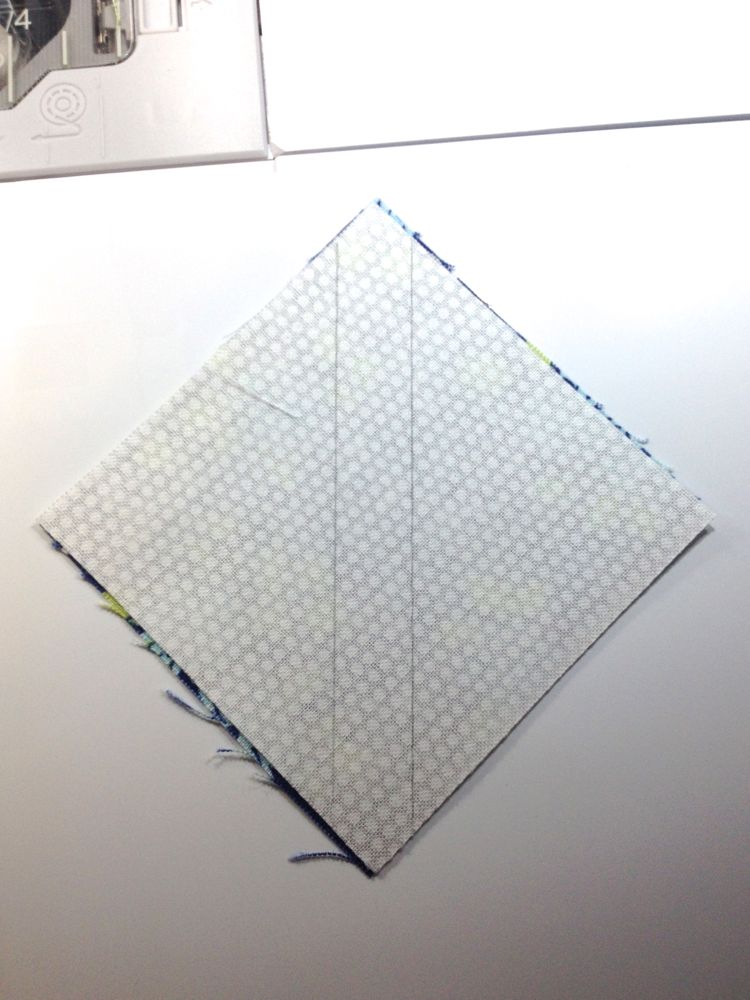
You just line up your stitched line with the size HST you are looking for and zip zip.

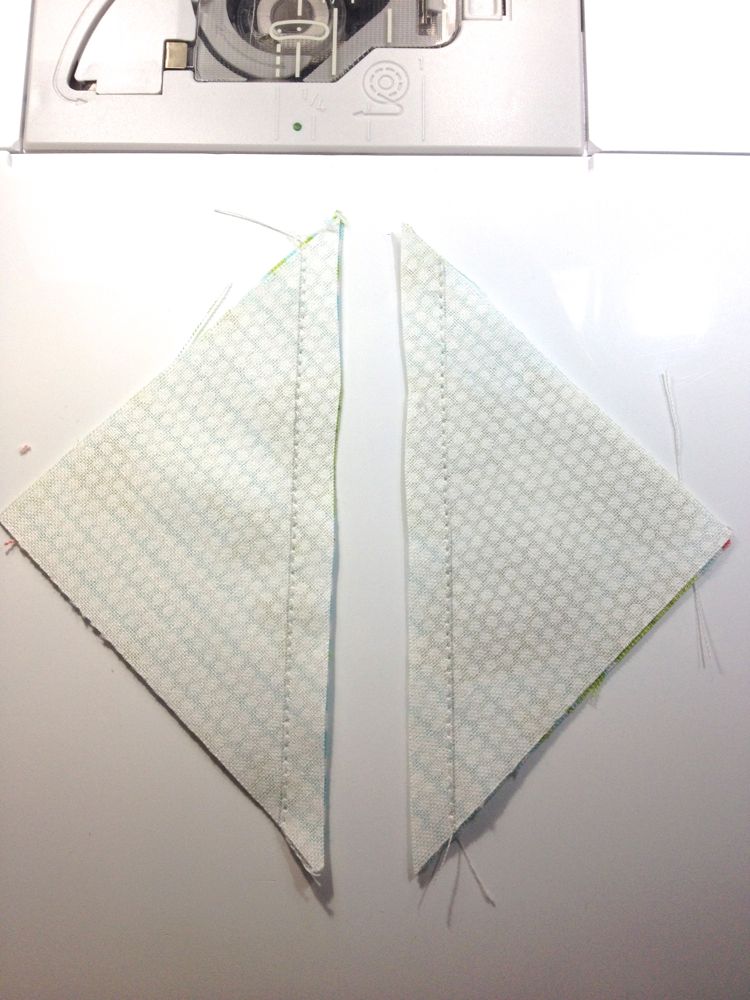
•Now the next step is how to get those dog ears off of there!

I use a cut diamond as my mental reference…

Related image

You want to cut the corners of your HST in like the top of a diamond looks. Once again… trimming half square triangles before opening and pressing is doing two sides at once!


You can free hand this with your rotary cutter…. just don’t cut your stitches!

Happy Quilting my fellow Sassies!

Online Quilting ClassJoin Craftsy’s Block of the Month

You can find and follow TheSassyQuilter  on Facebook, Pinterest, Bloglovin’, Instagram, Twitter or by email(form on right sidebar)!

Keep it Sassy♥


Share Button
09-18-2017

Bella Skill Builder…Block 7

Her we are… Block 7 in the Bella Skill Builder quilt along hosted by Fat Quarter Shop!

Bella Skill Builder
Block 7

Half Square and Quarter Square Triangles

You can find the Half Square 4 in 1 Ruler HERE and the 4.5″ Quilting Square Ruler HERE.

Both of these are very helpful for these blocks and a great addition to your ruler stash!


These are the Quarter Square triangles for one of this months block. I though I would show you guys the technique for piecing these little boogers!

You start with your two squares right sides together… draw a diagonal line and then stitch 1/4″ on both sides of the line.

Cut on the drawn line… and press open your two beautiful half square triangles.

Line up these two with right sides of fabric together and opposite colors of fabric together.

Draw another diagonal line from corner to corner…

Stitch 1/4″ on both sides of the line and then cut on the drawn line.

When you press these open you will have these two beauties!

Do a little squaring up using your ruler and Voila….

all done!


Don’t forget its not too late to get your supplies to join in! Below are the links to get you there.

Fat Quarter Shop has a Quilt Kit, Backing Set, and a Thread Set for this quilt.

Bella Skill Builder Quilt Kit Exclusive Fat Quarter Shop Kit designed by Sherri McConnell

Backing Set for Bella Skill Builder Quilt Kit 5.5 yards of SKU# 9900-89
Bella Skill Builder Thread PackFat Quarter Shop Exclusive

Craftsy

Keep it Sassy♥

You can find and follow TheSassyQuilter  on Facebook, Pinterest, Bloglovin’, Instagram, Twitter or by email updates(form on right sidebar)!

Share Button
05-24-2013

Block 1

IMG_1709

Okay guys…it’s go time! This is Block 1 of The Virtual Quilting Bee. This is a Sawtooth Star block with accents in the corners. I don’t know about you, but I love these blocks, they are just so darn adorable:)

This block was hosted by Sherri@A Quilting Life. Go and check out her tutorial for this block and all the details here.

If you are just checking in, we are joining  Amy@Diary of a Quilter  with her Virtual Quilting Bee. She is posting a new block every other week; 16 blocks (that finish 8″) total. We are a little behind, so I am posting a block every week until we catch up or you can go to her blog and wizz on through as fast as you like.

I am using the fabric line, Happy-Go-Lucky by Bonnie and Camille, to construct my blocks. Use whatever fabrics you like and join in anytime!

This block was pretty straight forward, only solid squares and half-square triangles(HST).

HST’s can be tricky, but the method used is one of the easiest.

IMG_1683

With your two squares face to face, draw a line from corner to corner. Then sew 1/4″ away from line on both sides. I used a little tool called “Quilter’s Magic Wand”, it has a line down the middle and is 1/4″ to the edge on both sides. It is great for marking 1/4″ lines. With this I will sew directly on my marked line.

         IMG_1685  IMG_1686

Once you have sewn your lines, cut directly between them. You can use a rotary cutter or your scissors. Then press open your HST!


         IMG_1688  IMG_1692

If you can make these….you got it made!

Square up and trim those little dog ears(yeah, that’s what they are called) off the corners.  Squaring up means using your ruler to make sure the block, or pieced part of a block, is the correct size. You may have to trim some excess(good thing) or rip and re-sew if too small(bad thing).

If all your HST’s are totally uncool and square,  you are ready to piece your block!

TIP: HST’s can be a little stretchy because of the bias edges, I like to use a little spray starch to keep things in shape. One of my faves is  Mary Ellen’s Best Press, it is clear and non-flaking.

Now get to making your Sassy Sawtooth


(Linking in with LinkAFinishFriday@RichardandTanyaQuilts , ThankGoodnesIt’sFinishedFriday , Quilt Story and ShineOnFriday)

Share Button